Guide · Self-timer
How to take more than one photo on an iPhone timer (and space them out)
Apple’s timer counts down and shoots one moment. Here’s how to squeeze more out of it, and when to switch to an interval camera.
 By Gül Eda Aydemir7 min read
The iPhone Camera app’s timer counts down 3, 5 or 10 seconds, then captures one moment. To get more than one photo:
- Live Photo: leave it on, then pick a different key photo in the Photos app.
- Re-fire from your wrist or ears: Apple Watch Camera Remote, or the stem of supported AirPods on iOS 26 and later.
- iPhone Duo: Smart Take shoots up to 20 photos over a couple of minutes while you pose.
- Interval camera: set a start delay, a gap between photos and a photo count, and the phone keeps shooting while you move. In SHOOTS: Photoshoot start 10 s, Timer mode 3 s, Photo limit 25.
You prop the phone on a wall, set the timer, run into place, and get exactly one moment. Maybe your eyes are closed. Maybe your hair is mid-blow. Maybe it’s actually good, and you want ten more like it with a slightly different pose. Either way, you walk back to the phone and start again.
This guide covers what the built-in timer really does, three ways to get more out of it without installing anything, and how interval shooting works, the setting that turns one timed photo into a whole photoshoot. We’ll show the settings in SHOOTS, the hands-free camera we make, but the ideas work in any interval camera.
What the built-in iPhone timer actually does
According to Apple’s iPhone User Guide (checked again for iOS 27 on 24 October 2026):
- Open Camera. Tap or swipe up from the camera modes at the bottom of the screen.
- Tap Timer. Choose 3, 5 or 10 seconds.
- Tap the Shutter button. The countdown starts and you get into the frame.
The 5 second option is newer: Apple’s iOS 18 version of the same page lists only 3 and 10 seconds. To turn the timer off, open Timer again and switch it off.
What’s missing is just as important. There’s no setting for how many photos to take and no gap between them. Apple’s guide doesn’t say exactly what the timer captures, and depending on your iPhone and whether Live Photo is on, you may find a single photo, a Live Photo or a short burst in your library. Whatever lands, it all comes from the same second or two: one pose, one expression, one chance.
Three ways to get more photos without another app
- Use Live Photo as a safety net. Apple says a Live Photo captures what happens just before and after you take the photo. If you blinked on the main frame, open it in Photos, tap Edit and set a different key photo. It’s still the same couple of seconds, but it often rescues a blink.
- Fire the shutter from your Apple Watch. The Camera Remote app shows a live preview on your wrist, and every tap of its shutter takes another photo (with a 3-second timer by default). You can shoot ten photos without walking back to the phone. Our Apple Watch camera remote guide covers it step by step.
- Use your AirPods as a shutter. On iOS 26 and later, AirPods 4, AirPods 5, AirPods Pro 2, AirPods Pro 3 and AirPods Max 2 can take a photo in the Camera app when you press (or press and hold) the stem. Set it up in Settings, under your AirPods’ name, then Camera Remote.
All three work, and all three have the same catch: you trigger every photo. Your hand moves to your wrist or your ear before each frame, your eyes go with it, and you spend the shoot thinking about the button instead of the pose.
A timer gives you one moment. An interval gives you a whole photoshoot.
Interval shooting: photos spaced out, hands-free
An interval camera (photographers call it an intervalometer) takes a photo, waits, takes another, and keeps going on its own. You set three numbers:
- Start delay: how long before the first photo. Enough to walk into place.
- Interval: the gap between photos. Enough to change pose, but short enough to stay in the flow.
- Photo count: how many photos before it stops.
Total time is roughly the start delay plus the interval times the number of gaps. A 10 second delay, a 3 second interval and 25 photos is 10 + 24 × 3 = 82 seconds: about a minute and a half of posing, with no walking back and forth.
How to set it up in SHOOTS
- Prop the phone. Chest height, back camera facing where you’ll stand. No tripod? See places to prop your phone.
- Set Photoshoot start. Instant, 3, 5, 10, 15, 30 or 60 seconds before the first capture.
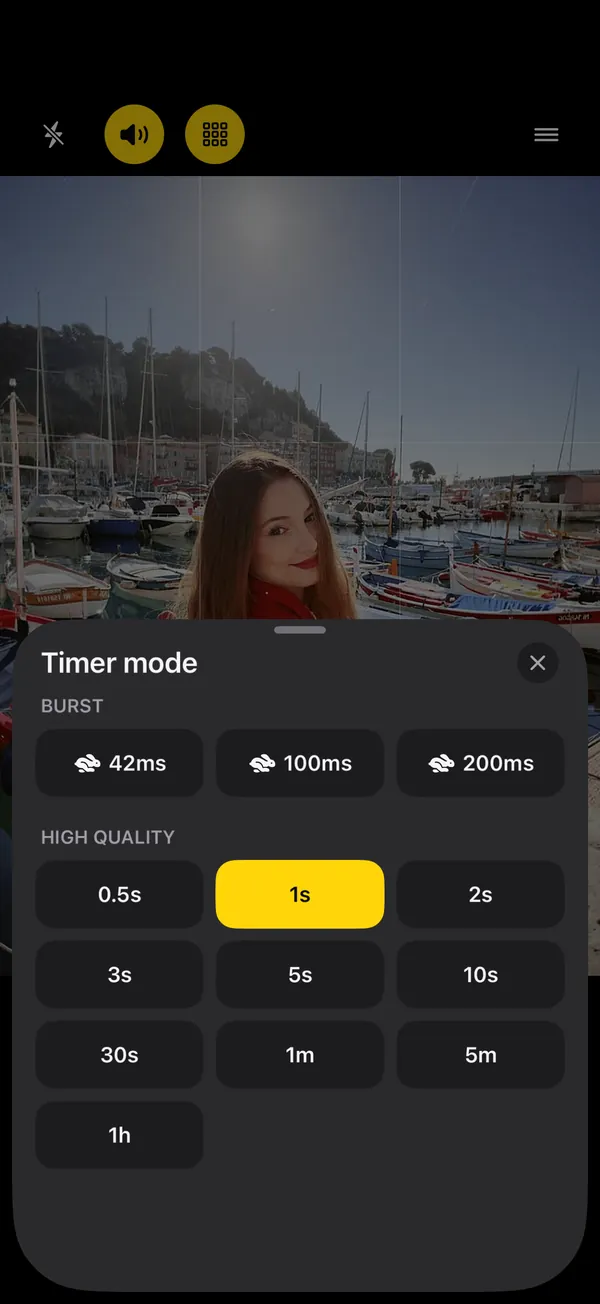
- Set Timer mode. High-quality intervals from 0.5 s, 1 s, 2 s, 3 s, 5 s, 10 s, 30 s, 1 min and 5 min up to 1 h. Burst intervals of about 42 ms, 100 ms and 200 ms are part of SHOOTS+.
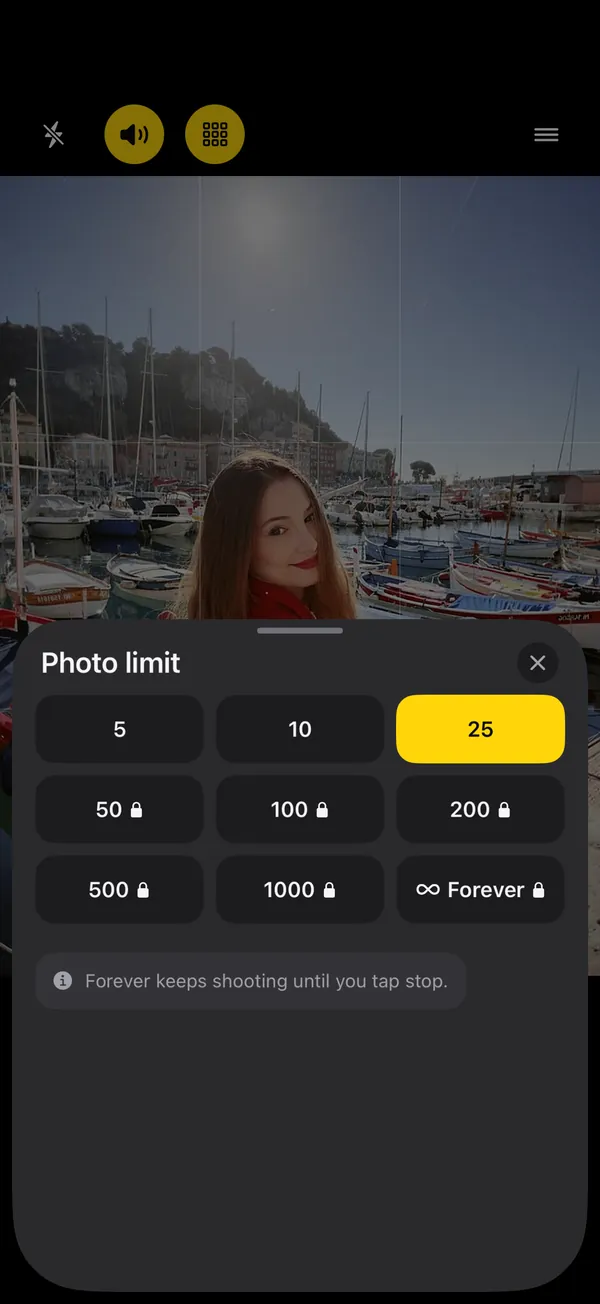
- Set Photo limit. 5, 10 or 25 photos in the free version; 50 up to 1,000, or Forever (keeps going until you tap stop), with SHOOTS+.
- Tap the shutter and step in. A 3-2-1 countdown with beeps runs, then SHOOTS fires shot after shot. The on-screen counter shows progress like 13 / 25. Tap again to stop; a paused shoot can be resumed. A volume button works as the shutter too.
- Or start it from where you stand. Turn on Hands-free start in Photoshoot start, walk to your spot, and raise your palm or say “Cheese”. The countdown is at least 3 seconds, so you can drop your hand first. Free, like Siri, the widgets and the remotes in How to start a photoshoot hands-free.
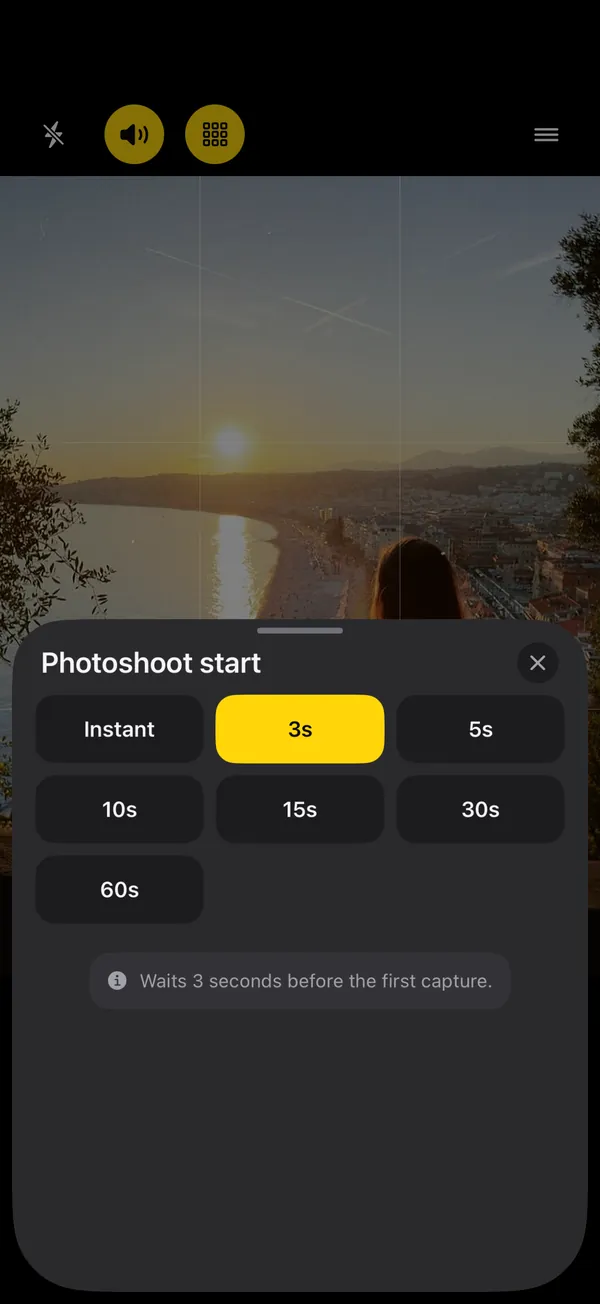
- Photoshoot start
- 10 s
- Timer mode
- every 3 s
- Photo limit
- 25 photos
- Shutter sound
- Beep
- Countdown beeps
- On
Why Beep as the shutter sound: it plays one beep the moment each photo is taken, so you always know when to change pose. Twenty-five photos, twenty-five beeps.
Which gap for which photo
| Shot | Timer mode | Photo limit |
|---|---|---|
| Walking toward the camera, twirls, hair flips | 0.5 s or 1 s | 25 |
| Jumps and splashes | Burst, 42 to 200 ms (SHOOTS+) | 25 or more |
| Natural posing, small changes | 3 s | 25 |
| Slow, careful poses, outfit details | 5 s | 10 to 25 |
| A group rearranging between frames | 10 s | 10 |
| Sunset, as the light changes | 30 s or 1 min | 25 |
The full breakdown, with battery and heat tips for long shoots, is in Interval shooting on iPhone: which interval for which shot.
Built-in timer vs an interval camera
| iPhone Camera timer | SHOOTS | |
|---|---|---|
| Start delay | 3, 5 or 10 s | Instant, 3, 5, 10, 15, 30 or 60 s |
| Photos per press | One moment | 5, 10 or 25 free; up to 1,000 or Forever with SHOOTS+ |
| Gap between photos | None | 0.5 s to 1 h; bursts with SHOOTS+ |
| Start without touching the phone | Volume buttons or Camera Control press the shutter; Smart Take on iPhone Duo | Raise your palm, say “Cheese”, Siri, widgets, volume buttons; all free |
| Remotes | Apple Watch Camera Remote with live preview, one photo per tap; supported AirPods | Apple Watch (iPhone only), or a second iPhone or iPad: free controls that start the whole shoot; live picture with SHOOTS+ |
| Where photos land | Your Photos library | Its own album per shoot; save to Photos, the app, or both |
The honest version: for one quick group photo, the built-in timer is fine and already on your phone. The moment you want to pose, move between frames, or come home with more than one usable shot, the interval is what makes the difference.
After the shoot: keep two, lose twenty
Twenty-five photos of the same spot add up fast. In SHOOTS every shoot gets its own album in the gallery, so you’re not hunting through your camera roll. Heart your favorites, drag across the thumbnails to select the misses and delete them (they wait in Trash for 30 days). Turn the keepers into a carousel with DUMP, and once a week, sweep the rest of your camera roll with Solo.Swipe.
New to solo shooting? Start with how to take good photos of yourself when no one’s around, then try the 12 poses that work on a self-timer.
Questions people ask
Can the iPhone camera timer take multiple photos?
How do I take a photo every few seconds on iPhone?
Can I set the iPhone timer longer than 10 seconds?
Does interval shooting make a timelapse video?
Can I take more photos from my Apple Watch?
Gül Eda Aydemir is the independent iOS developer behind SHOOTS, DUMP and Solo.Swipe. She designs, builds and answers support for every app herself. Say hi at solostaseraofficial@gmail.com.
Prop up your iPhone, step into frame and let SHOOTS run the whole photoshoot.
Download on theApp Store
On a computer?Scan with your iPhone camera
Keep reading
How to take good photos of yourself when no one's around
No tripod, no friend, no stranger you have to trust with your phone. Just a ledge, a timer and a plan.
Gül Eda Aydemir · 6 min read
How to start a photoshoot without touching your phone
The worst part of a timer shot is the sprint from the phone to your spot. Here are all the ways to skip it, with Apple’s Camera and with SHOOTS.
Gül Eda Aydemir · 7 min read
How to use your Apple Watch as a camera remote
Apple’s free Camera Remote app is genuinely good. Here’s how to use it, where it stops, what a hands-free interval remote adds, and what to do when there’s no Watch (or the camera is an iPad).
Gül Eda Aydemir · 8 min read