Guide · Apple Watch
How to use your Apple Watch as a camera remote
Apple’s free Camera Remote app is genuinely good. Here’s how to use it, where it stops, what a hands-free interval remote adds, and what to do when there’s no Watch (or the camera is an iPad).
 By Gül Eda Aydemir8 min read
- Apple’s way: prop your iPhone, open Camera Remote on your Watch, frame the shot on the live preview, zoom with the Digital Crown and tap the shutter. It shoots with a 3-second timer by default, one photo per tap, within about 33 feet (10 m).
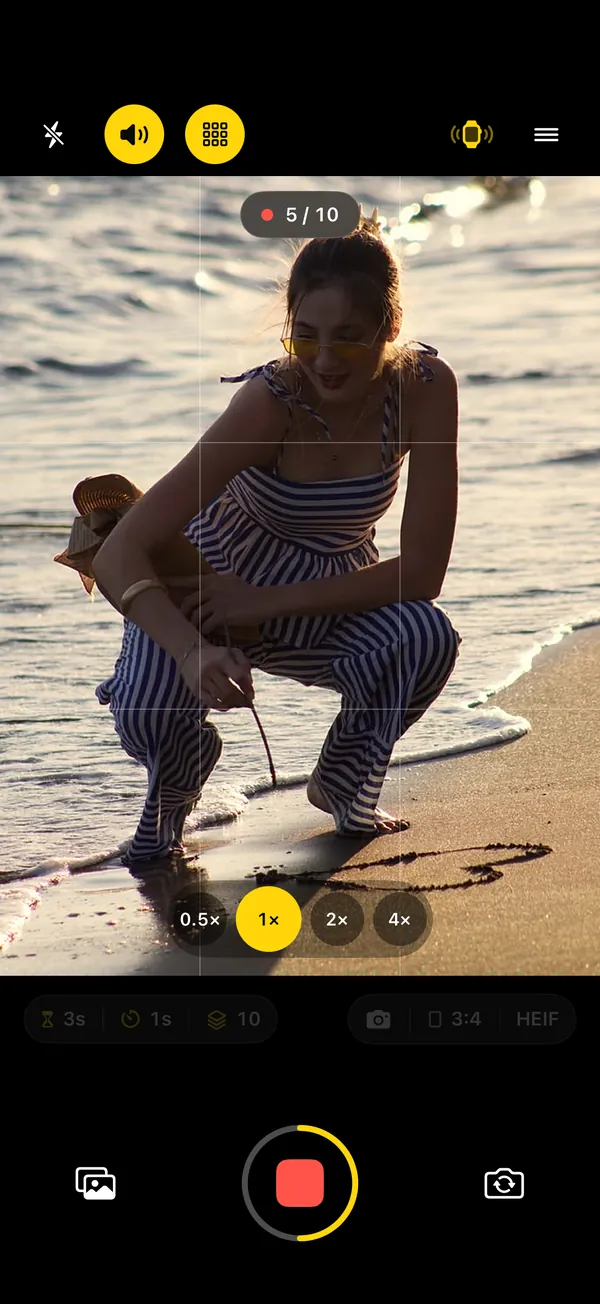
- When you want a whole series of photos without touching anything between frames, start an interval shoot from your wrist instead. The SHOOTS Watch remote is free; the live viewfinder on the Watch is part of SHOOTS+.
- Apple Watch needs an iPhone. It doesn’t pair with an iPad. Shooting with an iPad, or no Watch? In SHOOTS a second iPhone or iPad can be the remote (controls free, live picture SHOOTS+), or skip remotes and start with a raised palm or “Cheese”.
If you own an Apple Watch, you already own a camera remote. Apple’s Camera Remote app turns your wrist into a viewfinder for your iPhone, and for a lot of people it’s all they’ll ever need. This guide shows how to use it properly, what it does well, where it stops, and how the SHOOTS Watch app (made by us) fills the gap for hands-free photoshoots.
How to use Apple’s Camera Remote
These steps follow Apple’s Apple Watch User Guide (checked again for watchOS 27 on 24 October 2026).
- Steady the iPhone. Apple’s own tip: put it on a stable surface or a tripod. A wall, a shelf or your bag works too (see places to prop your phone).
- Open Camera Remote on your Watch. When the Camera is open on your iPhone, a hint also appears at the bottom of the watch face: tap it to open the Smart Stack, then tap Camera Remote.
- Frame the shot. Use the Watch as a viewfinder. Turn the Digital Crown to zoom. Tap the key area of the preview to adjust exposure.
- Take the photo. Tap the shutter. By default there’s a 3-second timer, enough to lower your arm.
- Record video if you want. Touch and hold the shutter until recording begins; tap Stop to end.
- Review. Tap the thumbnail at the bottom left and swipe through your shots. Everything is saved to the Photos app on your iPhone.
Under More Options you’ll find four settings: Timer (the 3-second timer on or off), Camera (Front or Rear), Flash (Auto, On or Off) and Live Photo (Auto, On or Off).
What Apple’s app does really well
- It’s free and already there. Nothing to install, nothing to set up.
- You see the frame before you shoot. For solo photos, that live preview is the single most useful thing a remote can do. No more walking back to check if your head is cut off.
- It uses the iPhone’s own Camera. Every photo goes through the same camera and lands in the same library as any other photo you take.
- Exposure, zoom, flash, Live Photo and video are all on your wrist, plus a review screen.
If you want three or four posed photos at a landmark and you’re happy to tap for each one, Camera Remote is excellent. Use it.
Where it stops
- One photo per tap. Apple’s guide lists no interval and no photo count. Every frame needs your hand on your wrist, and it shows: the raised arm, the eyes glancing down, the pose reset after each shot.
- The delay is 3 seconds or nothing. Fine when you’re already in position; tight if you start from the phone and need to walk ten steps.
- Range. About 33 feet (10 m) of Bluetooth range, so you can’t go far.
That’s the gap an interval camera with its own Watch app fills: you start the shoot once, drop your arm, and the phone keeps shooting while you move.
Tap once, then forget your wrist exists. That’s the whole idea.
The SHOOTS Watch app
SHOOTS is a hands-free interval camera for iPhone, with a companion Apple Watch app. On the iPhone you set the plan: Photoshoot start (Instant to 60 seconds), Timer mode (0.5 seconds to 1 hour between photos) and Photo limit. The Watch starts that plan from wherever you’re standing.
Free on the Watch:
- Start, stop and resume a shoot.
- Zoom with the Digital Crown; tap the zoom label to jump to the next lens.
- Flip between front and back cameras.
- Options: capture mode, flash and End Shoot.
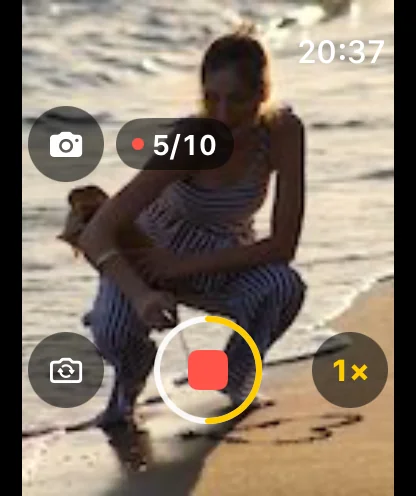
- Countdown, progress (like 5 / 10) and a “Done · 10” when the shoot ends.
With SHOOTS+: a live viewfinder on the Watch, so you see exactly what the iPhone sees and frame the shot from your wrist. If you use the ghost overlay on the iPhone (a see-through earlier photo over the viewfinder, for matching a pose), the Watch viewfinder shows it too.
What you need: an Apple Watch with watchOS 10.6 or later, paired with the iPhone you’re shooting with. Apple Watch pairs with an iPhone (Apple’s setup guide, checked 24 October 2026), so SHOOTS on iPad has no Watch remote. In SHOOTS, Settings → Apple Watch shows whether the Watch app is installed.
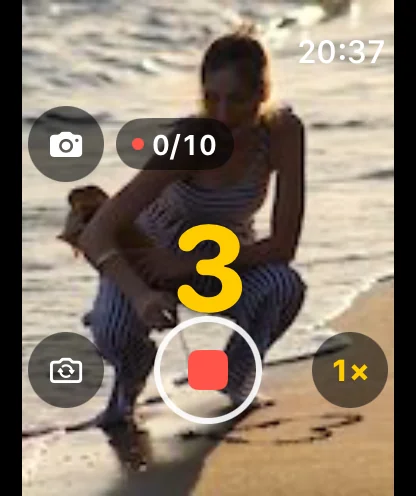
Your iPhone and Watch talk to each other directly over Apple’s WatchConnectivity. Preview frames and commands go between your own two devices; nothing goes to a server. Photos started from the Watch get a small “Triggered from Apple Watch” badge in the gallery.
Apple Camera Remote vs SHOOTS on the Watch
| Apple Camera Remote | SHOOTS Watch app | |
|---|---|---|
| Cost | Free, from Apple | Remote free; live viewfinder SHOOTS+ |
| Controls | iPhone’s Camera app | SHOOTS on the iPhone |
| Live preview on the Watch | Yes | With SHOOTS+ |
| What one tap does | Takes one photo (or starts a video) | Starts a whole shoot: 5, 10 or 25 photos free, up to 1,000 or Forever with SHOOTS+ |
| Delay | 3-second timer, on or off | The Photoshoot start you set: Instant to 60 s |
| Gap between photos | You decide, tap by tap | 0.5 s to 1 h, set once |
| Zoom | Digital Crown | Digital Crown, tap to jump lenses |
| Flash, camera flip | Yes | Yes |
| Exposure from the Watch | Tap the preview | Set on the iPhone |
| Review on the Watch | Yes | No; review in the iPhone gallery |
Short version: Apple’s app is the better viewfinder for free. SHOOTS is the better photoshoot: one tap, many frames, your hands free the whole time.
No Watch, or shooting with an iPad? Use a second iPhone or iPad
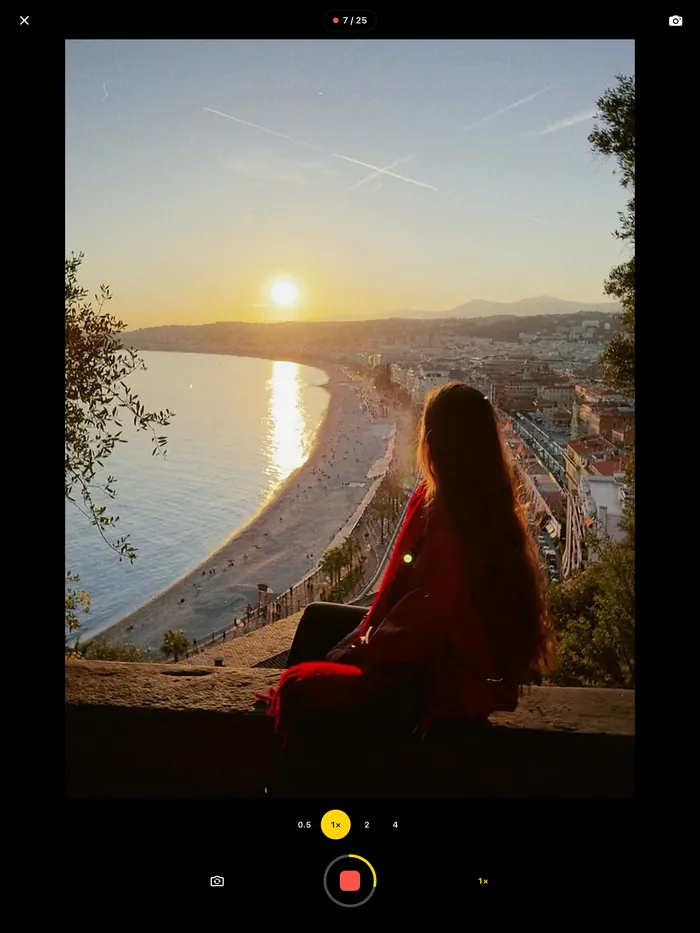
Apple’s Camera Remote lives on the Watch only. SHOOTS can also turn another iPhone or iPad into the remote for the device you’re shooting with: an old iPhone, a partner’s phone, or an iPad as a big viewfinder. It also works the other way round, with an iPad as the camera and an iPhone in your hand.
- On the camera: open Menu → Remote and turn on “Another iPhone or iPad as remote”.
- On the remote: open Menu → Remote → “Use this device as a remote”, and tap the camera in the list.
- Allow it once: tap Allow on the camera. You won’t be asked again for that device.
The remote starts and stops shoots and switches lenses and modes for free. The live picture on the remote’s screen is part of SHOOTS+ (on the camera device). The two connect directly over Wi-Fi or Bluetooth nearby, with no server; allow Local Network for SHOOTS on both. The full setup and troubleshooting are in How to use an iPad or second iPhone as your iPhone camera remote.
| Apple Watch (SHOOTS) | Second iPhone or iPad (SHOOTS) | |
|---|---|---|
| Works with | iPhone camera only | iPhone or iPad camera |
| Free | Start, stop, resume, Crown zoom, flip, mode, flash | Start, stop, lenses, modes |
| SHOOTS+ | Live viewfinder on the wrist | Live picture on a bigger screen |
| In the photo | Hides on your wrist | Hard to hide; best for whoever is behind the camera, or just out of frame |
| Connection | Apple’s Watch connection | Wi-Fi or Bluetooth nearby, Local Network allowed |
Tips for wrist-triggered photos
- Use a short start delay. When you start from the Watch you’re already in place. Set Photoshoot start to 3 or 5 seconds: just enough to drop your arm and breathe out.
- Hide the Watch. Wear it on the wrist away from the camera, or turn your arm so the face points inward. A lit-up screen in a portrait is distracting.
- Start once, pose many times. With a 3 second interval, change something on every frame: weight, chin, hands. The 12 poses that work on a timer are a good list to run through.
- Stop from the wrist. Someone walks into frame? Tap stop, wait, resume.
- Keep the phone close. If the Watch says iPhone not nearby, step closer and check Bluetooth. If it says Open SHOOTS, open the app on your iPhone; it also needs the iPhone unlocked once to connect.
- Review on the phone. Each shoot lands in its own album in the SHOOTS gallery. Heart the keepers and turn them into a carousel with DUMP.
No remote at all?
A few options. In SHOOTS, turn on Hands-free start (in Photoshoot start): raise your open palm to the camera until the ring fills, or say “Cheese”, and the shoot starts with at least a 3-second countdown. Both are free; more ways, including Siri and widgets, are in How to start a photoshoot hands-free. For Apple’s Camera app, on iOS 26 and later, supported AirPods (AirPods 4, AirPods 5, AirPods Pro 2, AirPods Pro 3 and AirPods Max 2) can take a photo in the Camera app with a press of the stem (checked 24 October 2026). Or simply: set a longer Photoshoot start in SHOOTS (10 to 60 seconds), tap the shutter on the phone and walk into place. The interval does the rest. Our guide on taking more than one photo on a timer explains the settings.
Traveling alone? The Watch lets you stay near your phone and stop the shoot the second someone gets too close. More in Solo travel photos.
Questions people ask
Is the Apple Watch Camera Remote app free?
How far away can my iPhone be from my Apple Watch?
Can Apple Watch Camera Remote take several photos automatically?
Does Camera Remote work with other camera apps?
Can I use my Apple Watch as a remote for an iPad camera?
Can another iPhone or iPad be the remote instead of a Watch?
Why does my Watch say Open SHOOTS or iPhone not nearby?
Gül Eda Aydemir is the independent iOS developer behind SHOOTS, DUMP and Solo.Swipe. She designs, builds and answers support for every app herself. Say hi at solostaseraofficial@gmail.com.
Prop up your iPhone, step into frame and let SHOOTS run the whole photoshoot.
Download on theApp Store
On a computer?Scan with your iPhone camera
Keep reading
How to take good photos of yourself when no one's around
No tripod, no friend, no stranger you have to trust with your phone. Just a ledge, a timer and a plan.
Gül Eda Aydemir · 6 min read
How to take more than one photo on an iPhone timer (and space them out)
Apple’s timer counts down and shoots one moment. Here’s how to squeeze more out of it, and when to switch to an interval camera.
Gül Eda Aydemir · 7 min read
How to start a photoshoot without touching your phone
The worst part of a timer shot is the sprint from the phone to your spot. Here are all the ways to skip it, with Apple’s Camera and with SHOOTS.
Gül Eda Aydemir · 7 min read